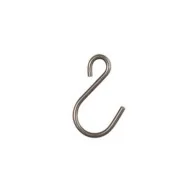
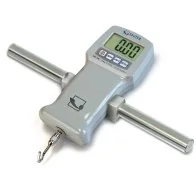
- Stainless steel handle bar with rubber grip for safe handling
- Suitable for force gauge SAUTER FA, FH, FL
- Scope of delivery: 1 piece
Home
Subcategories
Laboratory
Laboratory scales and analyzers
for professional work in the laboratory
Weighing
Here you will find any scale for professional applications in industry, trade und retail. Regardless of where your business weighs in - you'll find the right scale at Scales and Measuring.
Food
Scales and Machinery for catering and commercial food services
Medical
Medical scales and measuring devices
In the "Medical scales and measuring devices" category, we offer a wide range of high-quality and precise medical measuring instruments for clinics, doctor's practices, care facilities and veterinarians. These specialized devices are designed to carry out precise measurements and weight determinations in a medical context and thus contribute to the precise diagnosis, therapy and care of patients.
Our selection includes different types of medical scales that meet the specific requirements of different medical disciplines. These include body scales for determining patient weight, baby scales for precisely monitoring the growth of newborns, and animal scales for veterinary applications. These scales are carefully calibrated to ensure high accuracy and reliability.
In addition to scales, we offer a variety of other medical devices, including blood pressure monitors, pulse and oxygen monitors, and body temperature monitors. These instruments enable comprehensive monitoring of patients' vital parameters and thus support preventive medicine and the early detection of health problems.
Our products come from renowned manufacturers who adhere to the highest quality standards. They are ergonomically designed and easy to use, ensuring smooth integration into clinical or veterinary workflow. In addition, many of our medical devices are equipped with modern interfaces that enable seamless integration into digital health records and other information systems.
Trust our medical scales and devices to take precise measurements and create a reliable basis for medical decisions. With our extensive range, we support healthcare providers in ensuring optimal patient care and increasing the efficiency of their work processes.
Weights
Calibration weights for adjusting the scales
For centuries now, weight pieces have been used in scales for weighing procedures. This original purpose has now almost disappeared. Today, weights are used almost exclusively for adjusting and testing = calibration of electronic balances. They are now named “test weights” as this is their contemporary purpose.
Adjustment or calibration?
Adjusting a balance means that you are intervening in the weighing system, to make sure that the display is set to show the correct nominal value.
With calibration on the other hand, there is no intervention, you are testing whether the display is correct and documenting any deviation.
Testing, the right way!
The internationally valid OIML norm R111:2004 classifies test weights hierarchically in accuracy classes, where E1 is the most accurate and M3 is the least accurate weight class. With KERN you get the whole test weight range in all OIML accuracy classes E1, E2, F1, F2, M1, M2, M3.
As the test weight only becomes an ISO 9000ff-compliant test instrument when its accuracy has been proven, we offer the appropriate DAkkS Calibration certificate or verification certificate (in connection with a box) for all KERN test weights. For further details see chapter DAkkS Calibration Service.
We offers you the appropriate test weight package for your balance, consisting of the test weight, box and DAkkS-calibration certificate, as proof of its accuracy. The best prerequisite for a correct adjustment or checking of your scales.
Classes of accuracy of test weights E, F, M and their general relation to the types of balances:
E1
Test weights for customers who require a high degree of accuracy for the most demanding applications. For high-resolution balances with d > 1,000,000 Use recommended with DAkkS calibration certificate only.
E2
Most accurate test weights for high resolution analytical balances of verification class I ≥ 100,000 e
F1
Test weights for analytical balances/precision balances for verification class I/II ≤ 100,000 e
F2
Test weights for precision balances of verification class II ≤ 30,000 e
M1
Test weights for industrial and commercial scales of verification class III ≤ 10,000 e
The appropriate test weight for your new KERN balance can also be found directly in the accessories of the balance in our webshop.
Weight cases at a glance

It's your choice!
To protect your test weights we can offer you an appropriate weight case. If there are no legal or normative specifications, then you have the choice between plastic, aluminium protected or wood. The available weight cases are shown as a symbol in the test weight tables on the following pages. This way you have all the materials, versions, sizes and prices at a glance, listed in a concise way.
It's so easy to order your suitable test weight
- According to your safety requirements or the specifications of your QM system, you select the test weight with the appropriate weight value and the required tolerance (see chart below).
- We offer many test weights in different designs, giving you complete freedom to decide which test weights you want to use for your application. It goes without saying that all our test weights comply with the OIML R111:2004 directive.
- To protect your high-quality test equipment, we offer you cases in various designs. From low-priced plastic weight cases to aluminium protected weight cases to classic, high-quality wooden weight cases.
- A DAkkS calibration certificate – the auditor's favourite! With this certificate you provide the standard-compliant proof of all important values of your test equipment and are on the safe side when operating and testing your measuring equipment.
Selection of the appropriate test weight for your balance
A balance can never be more accurate than the test weight that is used to adjust it, it all depends on its tolerance. The accuracy of the test weight should correspond to the readout [d] of the balance, or rather be more precise.
Nominal weight value is shown in adjust mode “CAL” in the balance display. Given a choice, the heaviest weight is the most suitable for accurate measurement.
Once accuracy and nominal weight value are specified, the suitable test weight is selected according to the tolerances “Tol” of the indi vidual accuracy classes E2 – M3, see column “Tol ± mg” at the respective weight.
Example:
Balance with weighing range [Max] 2000 g = 2 kg and readout [d] = 0,01 g = 10 mg
- The accuracy of the required test weight is determined by readout [d]: max. tolerance ± 10 mg.
- Displayed weight size on “CAL” mode: 1000 g or 2000 g. The required test weight has a 2 kg weight size.
- Suitable test weights with ± 10 mg tolerance and 2 kg weight size, can be found in accuracy class F1.
Exception: analytical balances (readout [d] ≤ 0,1 mg): E1 test weights are recommended. Depending on the safety requirements, E2 test weights with a DAkkS calibration certificate will also be sufficient.
From finely turned to polished stainless steel – the right test weight for every situation

Composition table, valid for all KERN test weight sets from 1 mg

OIML norm R111:2004 for test weights
The key points from the OIML norm R111:2004 OIML (Organisation Internationale de Métrologie Légale) has established the exact metrological requirements for weights in verified applications in approx. 100 states all over the world. The OIML recommendation R111 (2004 Edition) for weights relates to sizes 1 mg – 5000 kg. Statements are made on the accuracy, materials, geometric shape, marking and storage of the weights.
Error limits for weights of classes E1 to M3
The error limit classes are in fixed hierarchical levels in the proportion of 1:3, where E1 is the most accurate and M3 is the least accurate weight class. When testing weights with other weights, the correct test class is the next highest class.
Error limit classes (= tolerances)
The values given in the table below (tolerances ± ... mg) are the respective permitted fabrication tolerances. They are to be equal to the measuring uncertainty of the weight, if no DAkkS calibration certificate is available.
Conventional mass
The problem is the air buoyancy, which makes the weight appear lighter. In order to avoid this “distortion” in daily use, all weights are adjusted to the unit specifications as given in R111, e.g. it is accepted that: material density of the weights is 8000 kg/m3, air density is 1.2 kg/m3 and measuring temperature is 20 °C.
Our test weights: Unless otherwise specified, they conform to OIML R111:2004 in every detail.
OIML R111:2004 Maximum permissible errors for weights = permissible tolerances “Tol ± mg”

The DAkkS kalibration (DAkkS - German accreditation authority) documents traceability to the national standard and thus meets the specific normative requirements of QM Systems.
International recognition:
 DAkkS/DKD
 COFRAC
 UKAS
UKAS ACCREDIA
 SAS
SAS ENAC
ENAC PCA
PCA AA
AAand much more
Measuring
Measurement technology for industry, laboratories and quality assurance
Accessories
Accessories
SALE
Offers and discontinued models
High speed data transfer software for force-time-measurements
- Force measurements can be conducted over a very short period, i.e. seconds
- A high speed data transfer to a PC is possible (with a transfer of up to 20 data sets per second) when combining the AFH FAST with SAUTER FH, FC or FL
- AFH FAST shows the results in a Force-Time-Graph and can export the data to Microsoft Excel
- Compatible with the following operating system: Microsoft Windows 10®
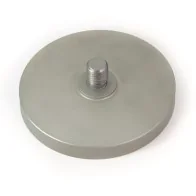
Pressure disc out of aluminium, thickness 10 mm, for compression tests up to 5 kN, ø 110 mm, outer thread: M12
Material: Aluminium
Scope of delivery: 1 piece
SAUTER 287-A01 Bracket for spring balance till 1000g/10N
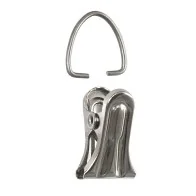
SAUTER 287-A02 Hook for spring balances 10-1000 g
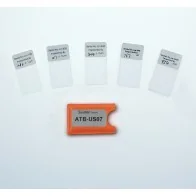
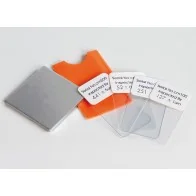
Calibration foils for increased measuring accuracy (covers the range from 20 up to 2000 µm, with ˂ 3 % tolerance)
ATE 01 Sensor, Type F for SAUTER Digital coating thickness gauge
Type F: Coatings on steel and iron
SAUTER ATE 02 Sensor Type N for coating thickness gauges
Type N: measuring Insulating coatings on non-magnetic metals
SAUTER ATC-01 Data transmission software for SAUTER TC, TE, TF and TG (interface cable included)
fits for digital coating thickness gauge TG 1250-0.1FN
magnetic and non magnetic
Holder for force measuring devices of the SAUTER FH range with external load cell
Suitable for motorised vertical test stand SAUTER TVM, TVS
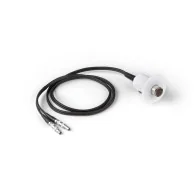
- External sensor, 5 MHz, Ø 6 mm
- for Digital coating thickness gauge SAUTER TB
- For thin test materials: measuring range (steel) 1 - 50 mm
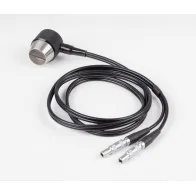
Ultrasonic probe, 5 MHz, Ø 12 mm, for hot test materials: Measuring range (steel) 3-200 mm at temperatures of up to 300°C
- External sensor, 7 MHz, Ø 6 mm
- For thin test materials: measuring range (steel) 0,75 - 80 mm
External sensor, 5 MHz, Ø 10 mm, transducer at an angle of 90°
- Ideal for transferring measuring data from the internal data memory of the measuring instrument to Microsoft Excel®
- Suitable for Coating thickness gauges SAUTER TC, SAUTER TE, SAUTER TF, SAUTER TG
- Hardness testing device SAUTER HD
- Sound level meter SAUTER SU
- Ultra-sound material thickness measuring device SAUTER TD-US, TN-US
- Compatible with following operating systems: Microsoft Windows 7, 8.1, 10®
- interface cable included
- External sensor, 2,5 MHz, Ø 14 mm
- for thick samples, in particular cast iron with rough upper surfaces: measuring range (steel) 3 - 300 mm
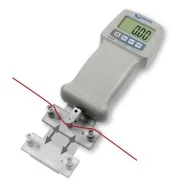
With this attachments for tensile strength testing, the SAUTER FK can become a tensiometer for testing the material tension characteristics of cables, threads, wires, twine etc
Tensiometer attachment with Safe-insert function: Pull and release to insert the running cable in between the rolls
Suitable for force gauge KERN FK (models SAUTER FK 10. to SAUTER FK 250.)
Force-measuring device is not included with the delivery
AFK 02 Stainless steel handle bar with rubber grip for safe handling
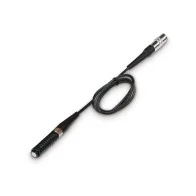
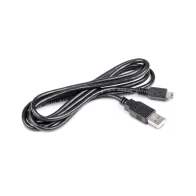
USB/PC connection cable to connect models from the SAUTER FL / DA / DB range to a PC
Scope of delivery: 1 piece
- hardness comparison plates for Shore A, tolerance up to ± 2 H
- Suitable for SAUTER-models HB and HD
- 7 pcs.
- hardness comparison plates for Shore D, tolerance up to ± 2 HD
- Suitable for SAUTER-models HB and HD
- 3 pcs.
Converter adapter/cable to connect peripheral devices with USB interface, suitable for all KERN balances and SAUTER measuring instruments with RS-232 output
Scope of delivery: Adapter, CD with driver


